

Introduction
This feature simplifies the process of exporting your payments data exactly how you want it. We’ve already organized the data for you, so all you need to do is choose which data you want and export it to Excel or CSV. In this guide, we’ll walk you through how to filter your payments data to find exactly what you’re looking for. Then, we’ll show you how to export that data into an Excel or CSV file. It’s a straightforward way to get the information you need, hassle-free. Let’s dive in and get started!Export payments as CSV
- Login to your merchant.clickpesa.com account.
- Navigate to Data Export and select Export Payments as CSV card.
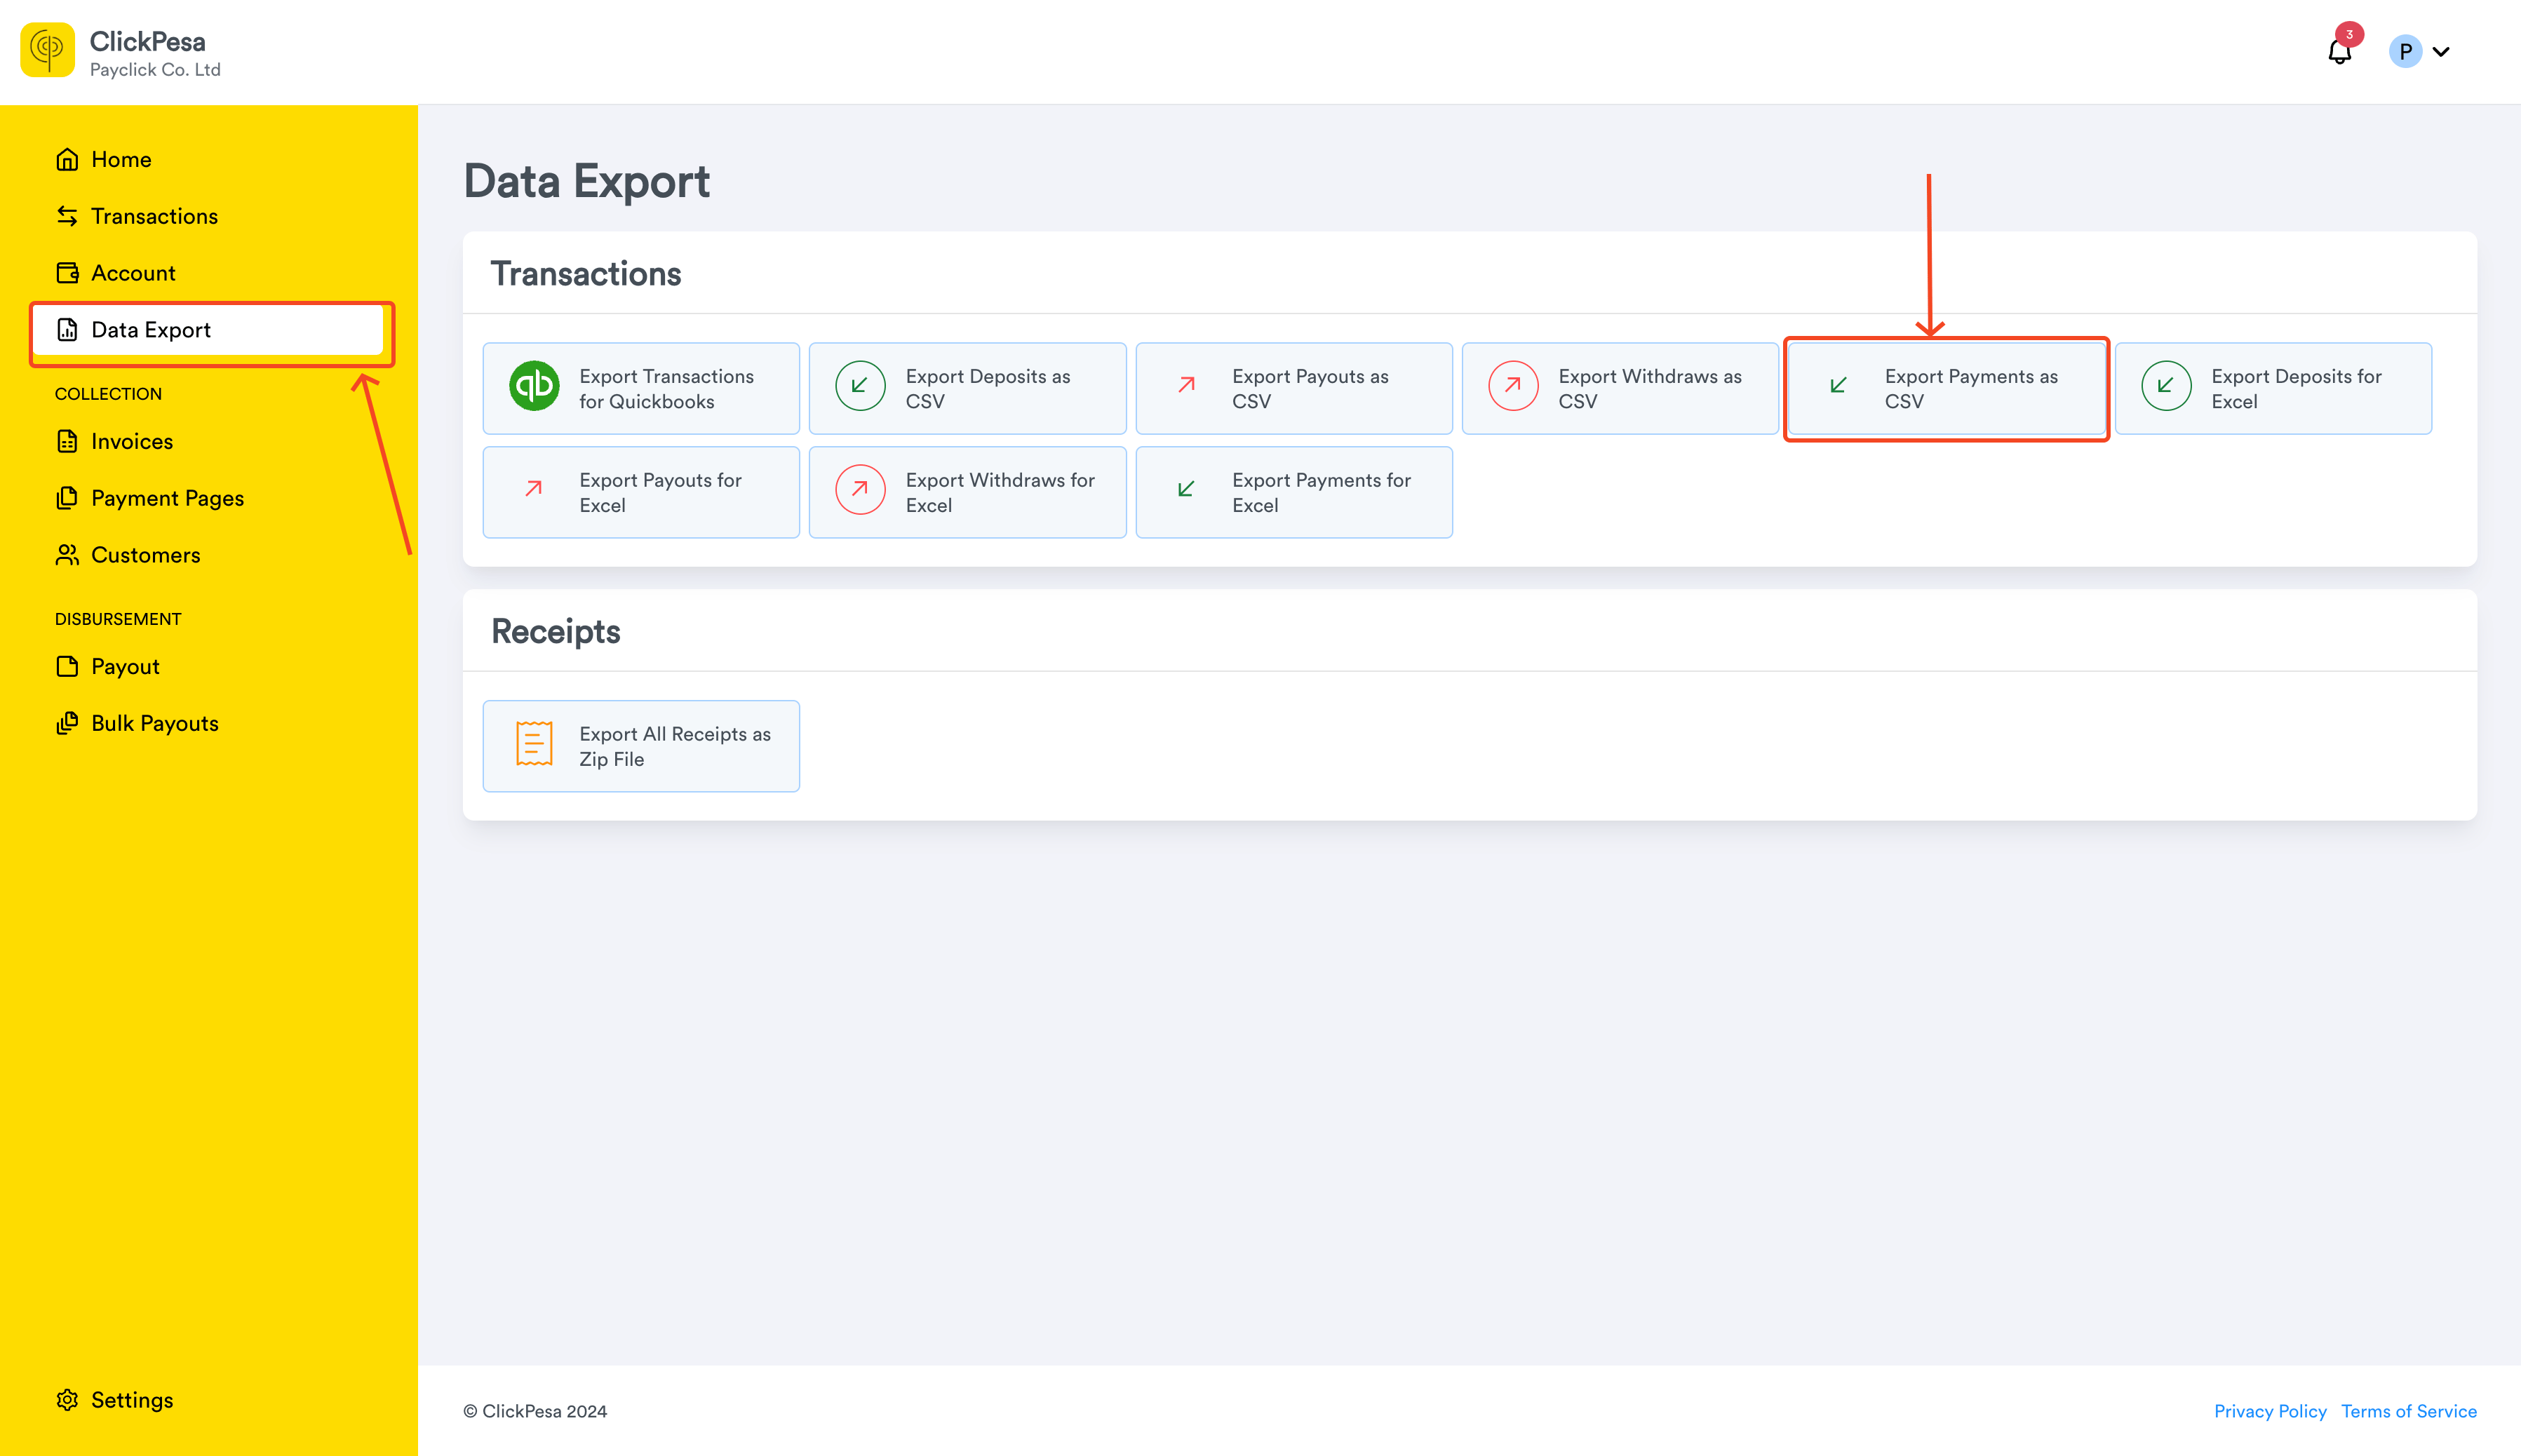
- You should land to page called Export Payments as CSV, with filters (Status and date preselected) and table and button to export and button for More Exports options.
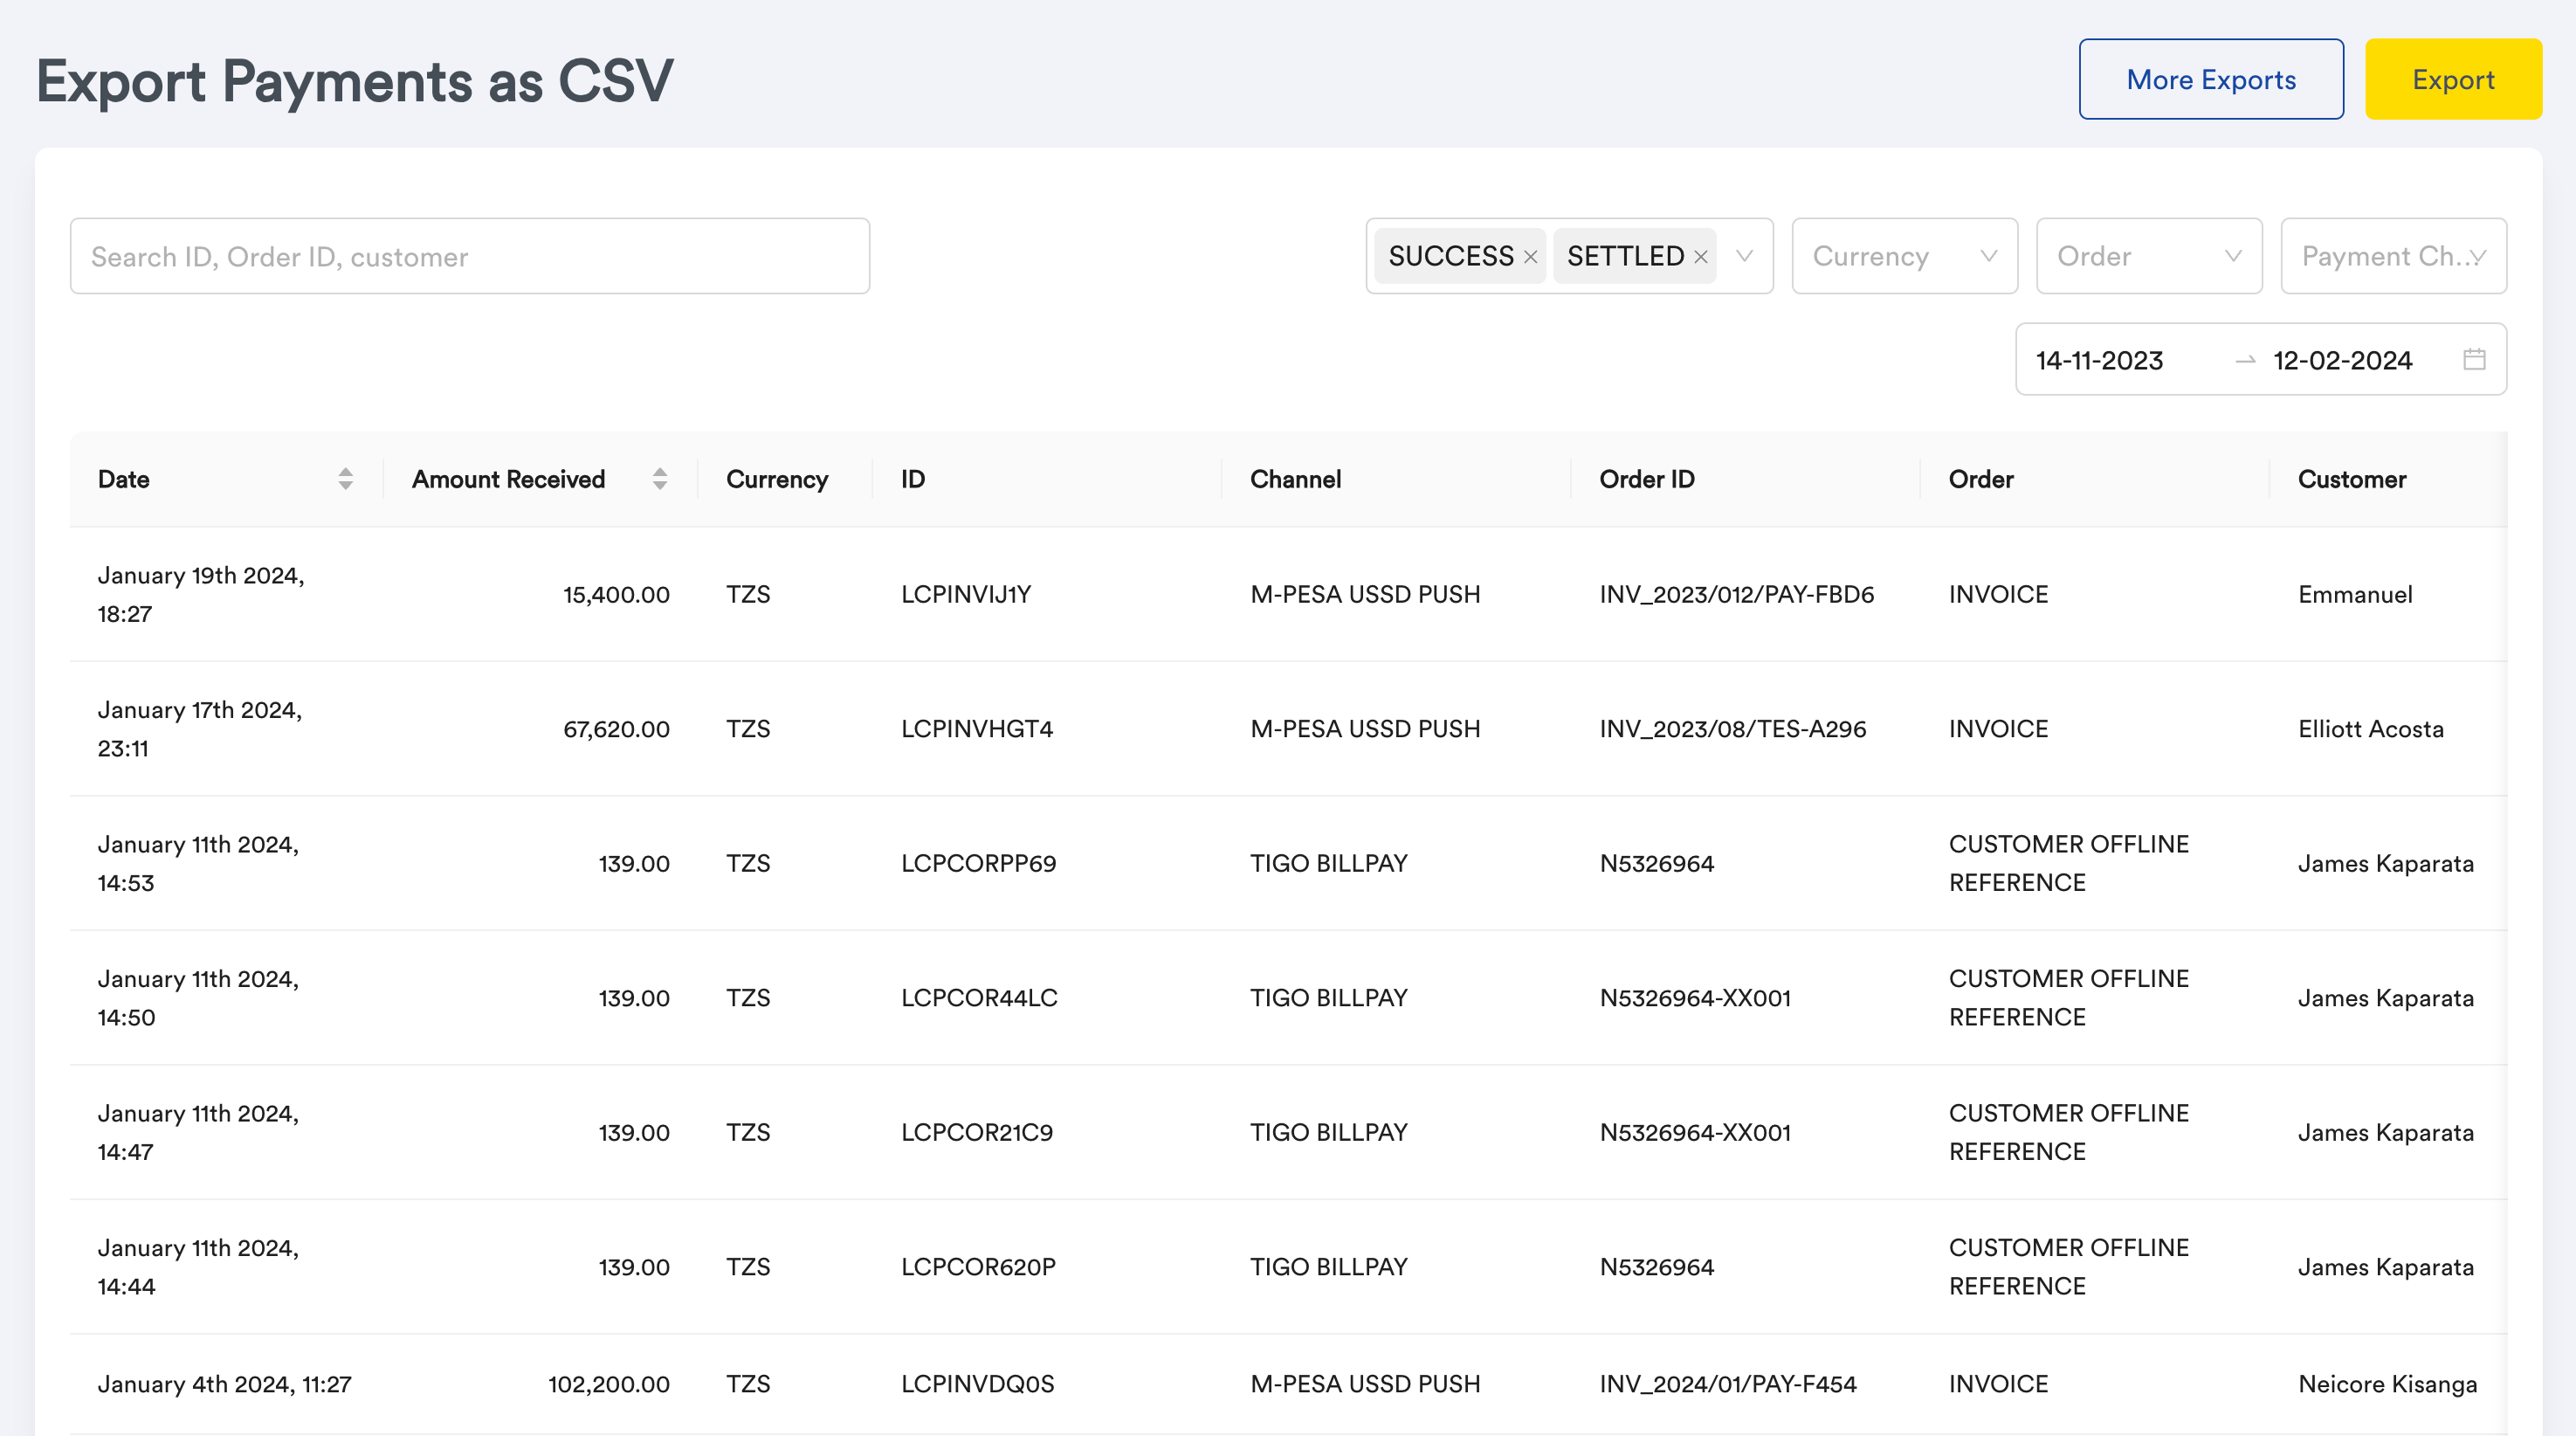
- You can use filters such as status, date range, payment channel to return the actual data you want to export.

- Upon clicking export browser will download a file called payments.csv. It will look like this.

Export payments for excel
- Login to your merchant.clickpesa.com account.
- Navigate to Data Export and select Export Payments for Excel card.
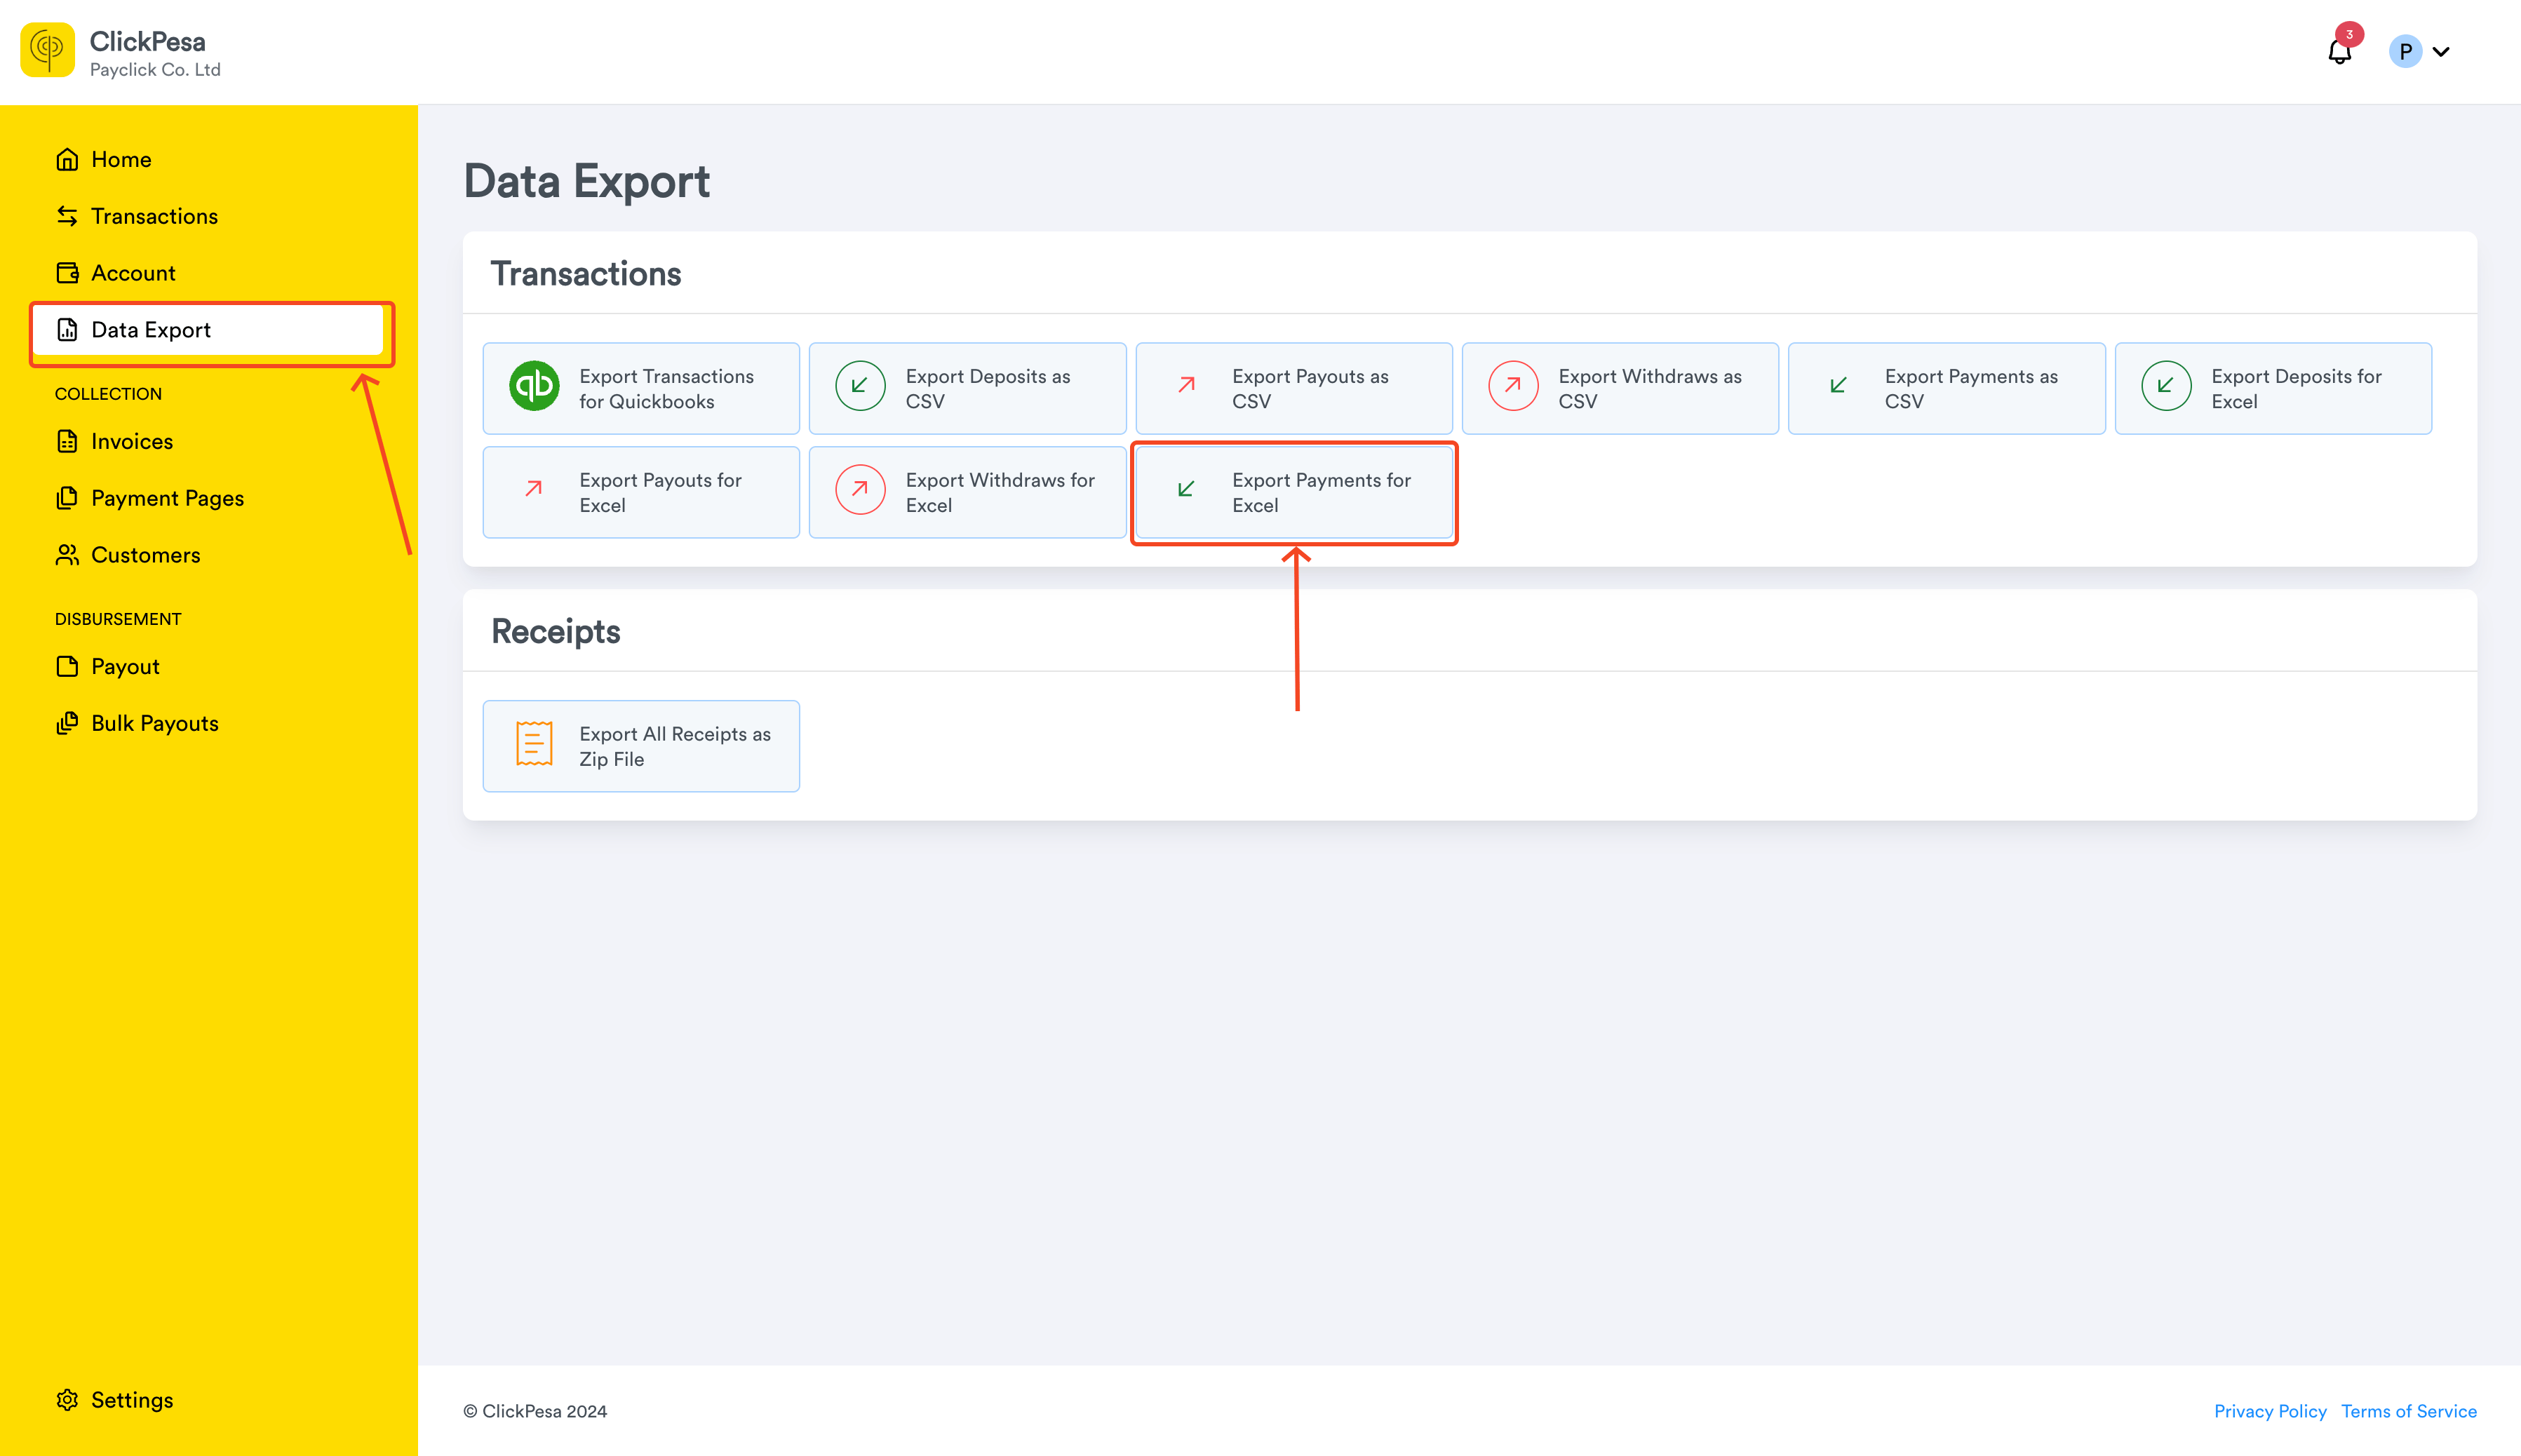
- You should land to page called Export Payments for Excel, with filters (Status and date preselected) and table and button to export and button for More Exports options.
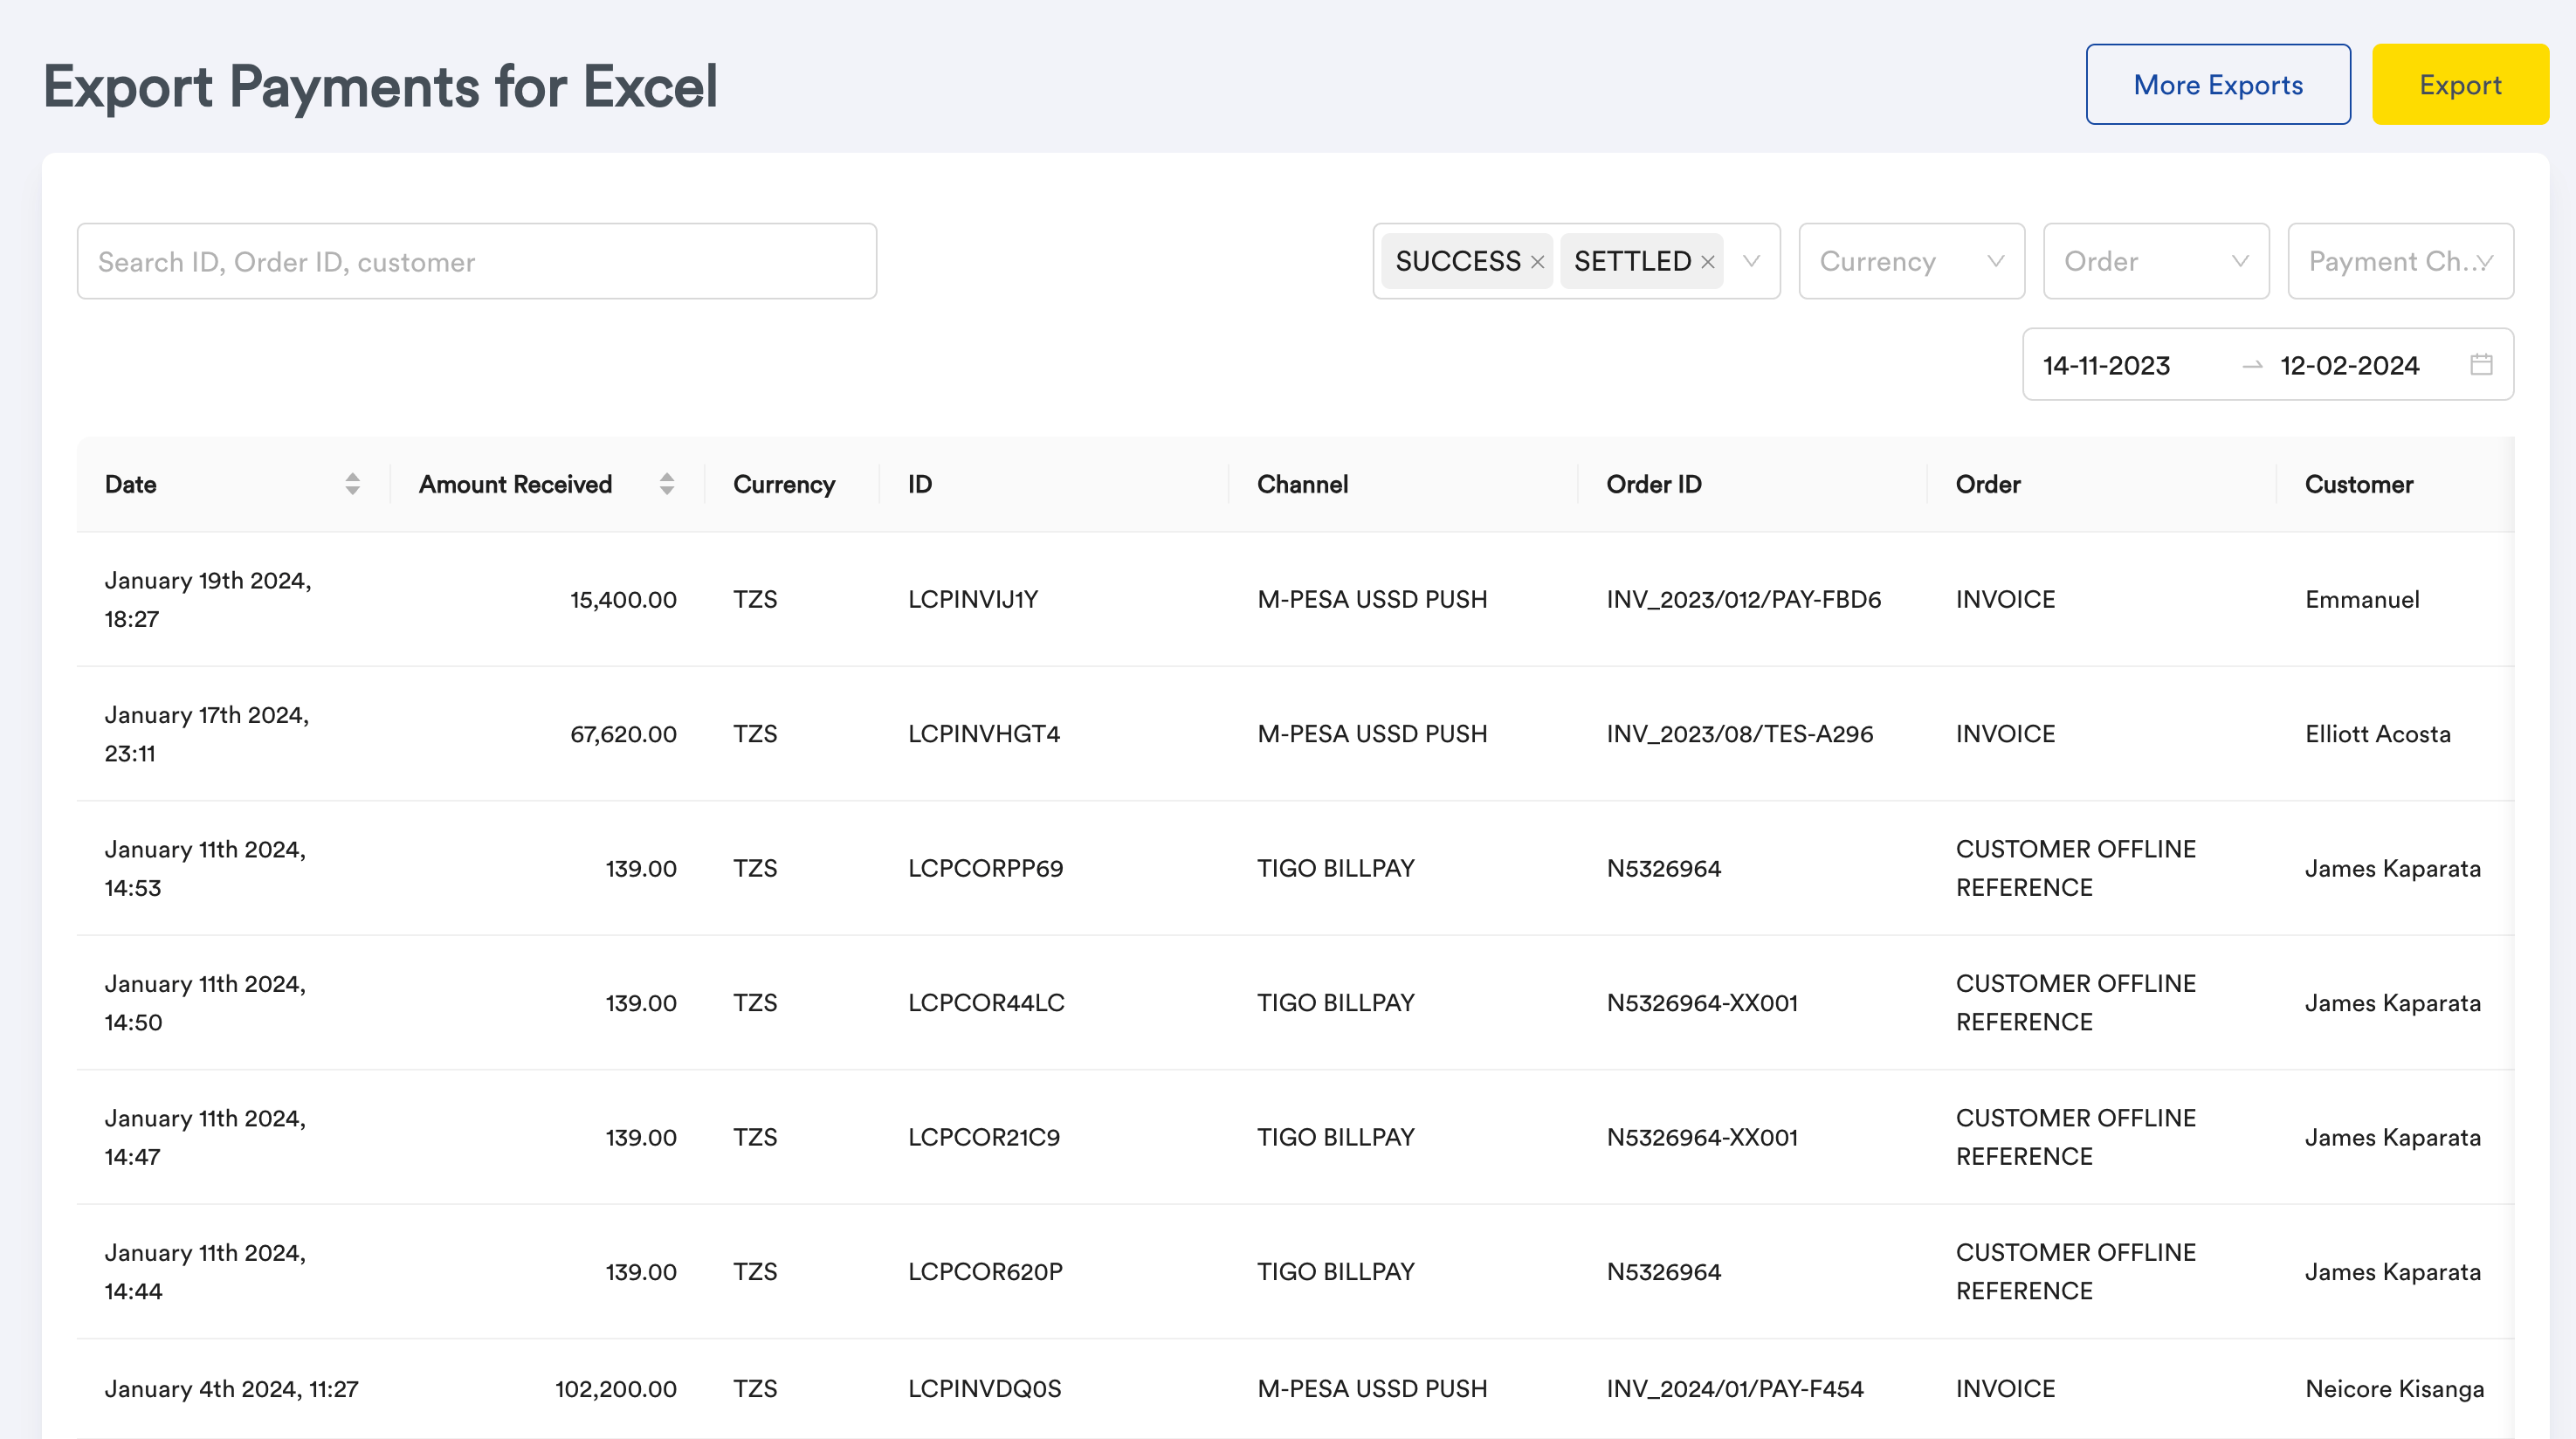
- You can use filters such as status, date range, payment channel to return the actual data you want to export.

- Upon clicking export browser will download a file called payments.xlsx. It will look like this.

Common Use cases
- Importing data into account systems or third parties systems.