> ## Documentation Index
> Fetch the complete documentation index at: https://docs.clickpesa.com/llms.txt
> Use this file to discover all available pages before exploring further.
# E-Invoice
> Create and manage invoices in the Merchant Dashboard
Learn how E-Invoices connect to hosted checkout in the [Hosted Checkout Overview](/checkout/checkout-overview).
## How to Use E-Invoice
### How to access invoices
To access the Invoice feature, visit [merchant.clickpesa.com](https://merchant.clickpesa.com/), login and navigate to the "Invoices" menu item.
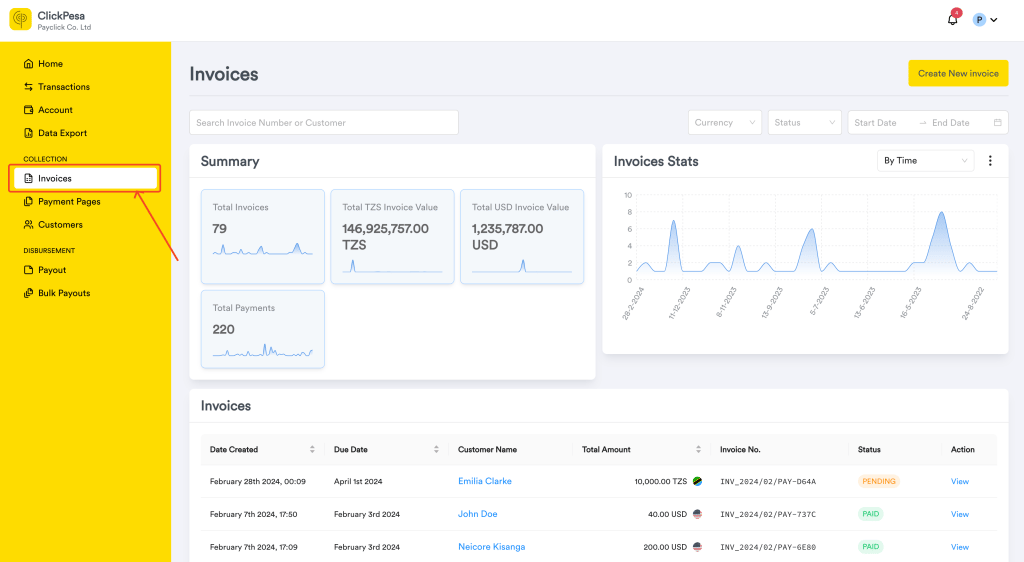 1. On the page you should be able to see summary with invoices count, value and total payments count associated with invoices.
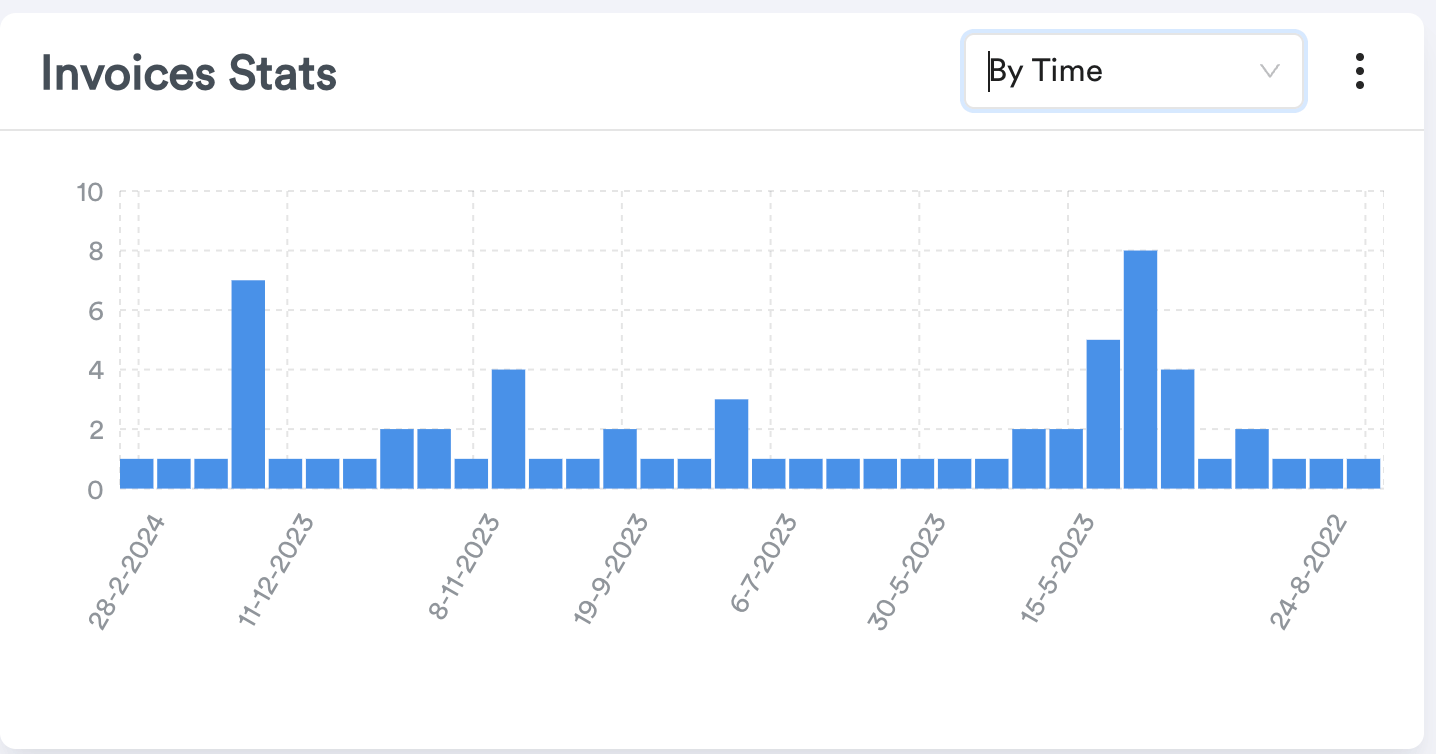
2. You will also be able to see a graph section where data are measured by time or status.
1. On the page you should be able to see summary with invoices count, value and total payments count associated with invoices.
2. You will also be able to see a graph section where data are measured by time or status.
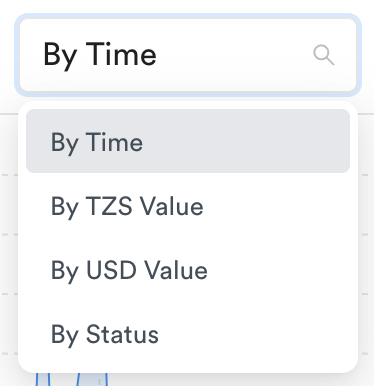
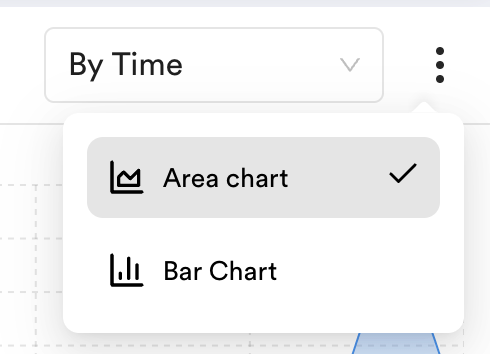
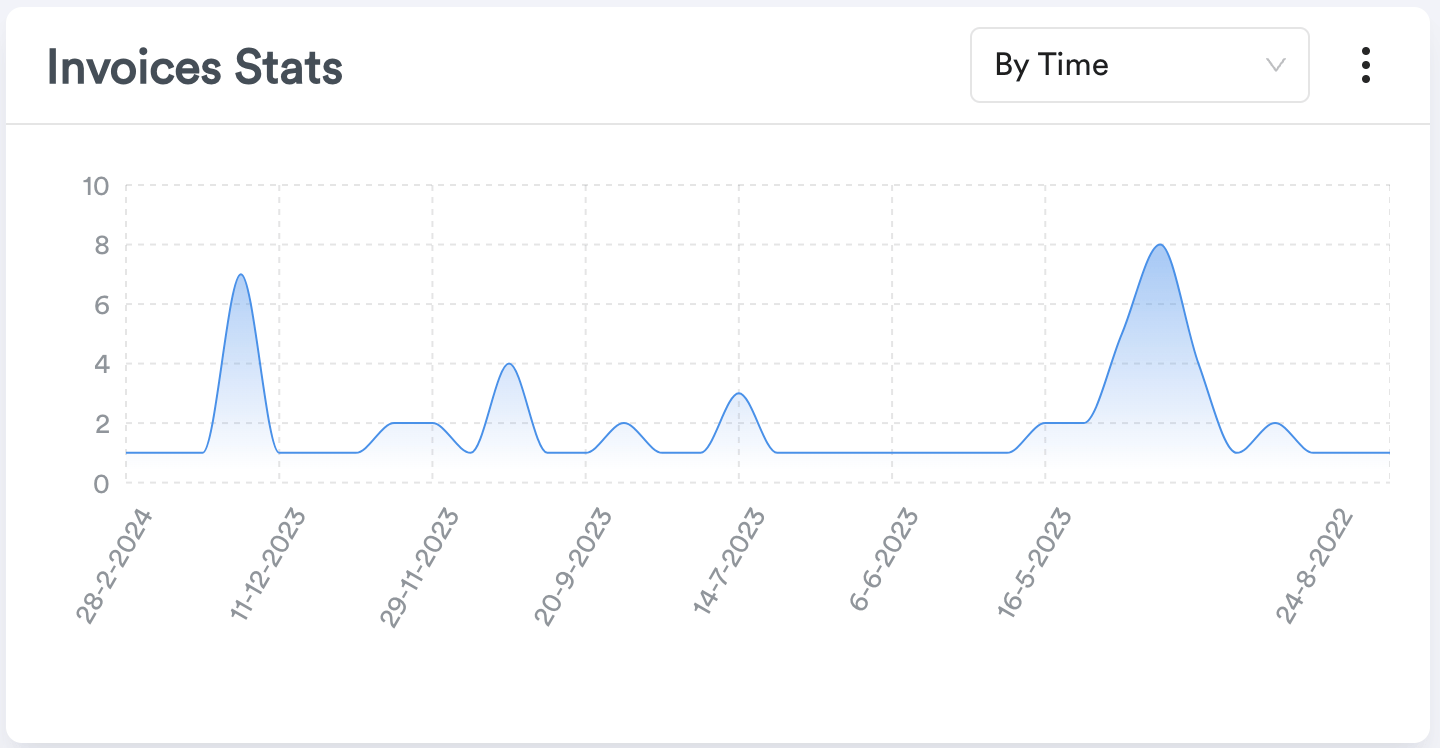 3. On the graph you will be able to change graph data by selecting Time, value or status. You should also be able to change data style between area chart and bar chart
 ### How to create an invoice
To fully utilize this feature, refer to the [Payment methods documentation.](/dashboard/settings/collection)
1. Click the "Create New Invoice" button on the Invoices tab.
### How to create an invoice
To fully utilize this feature, refer to the [Payment methods documentation.](/dashboard/settings/collection)
1. Click the "Create New Invoice" button on the Invoices tab.
 2. Fill in the following information about the invoice and submit
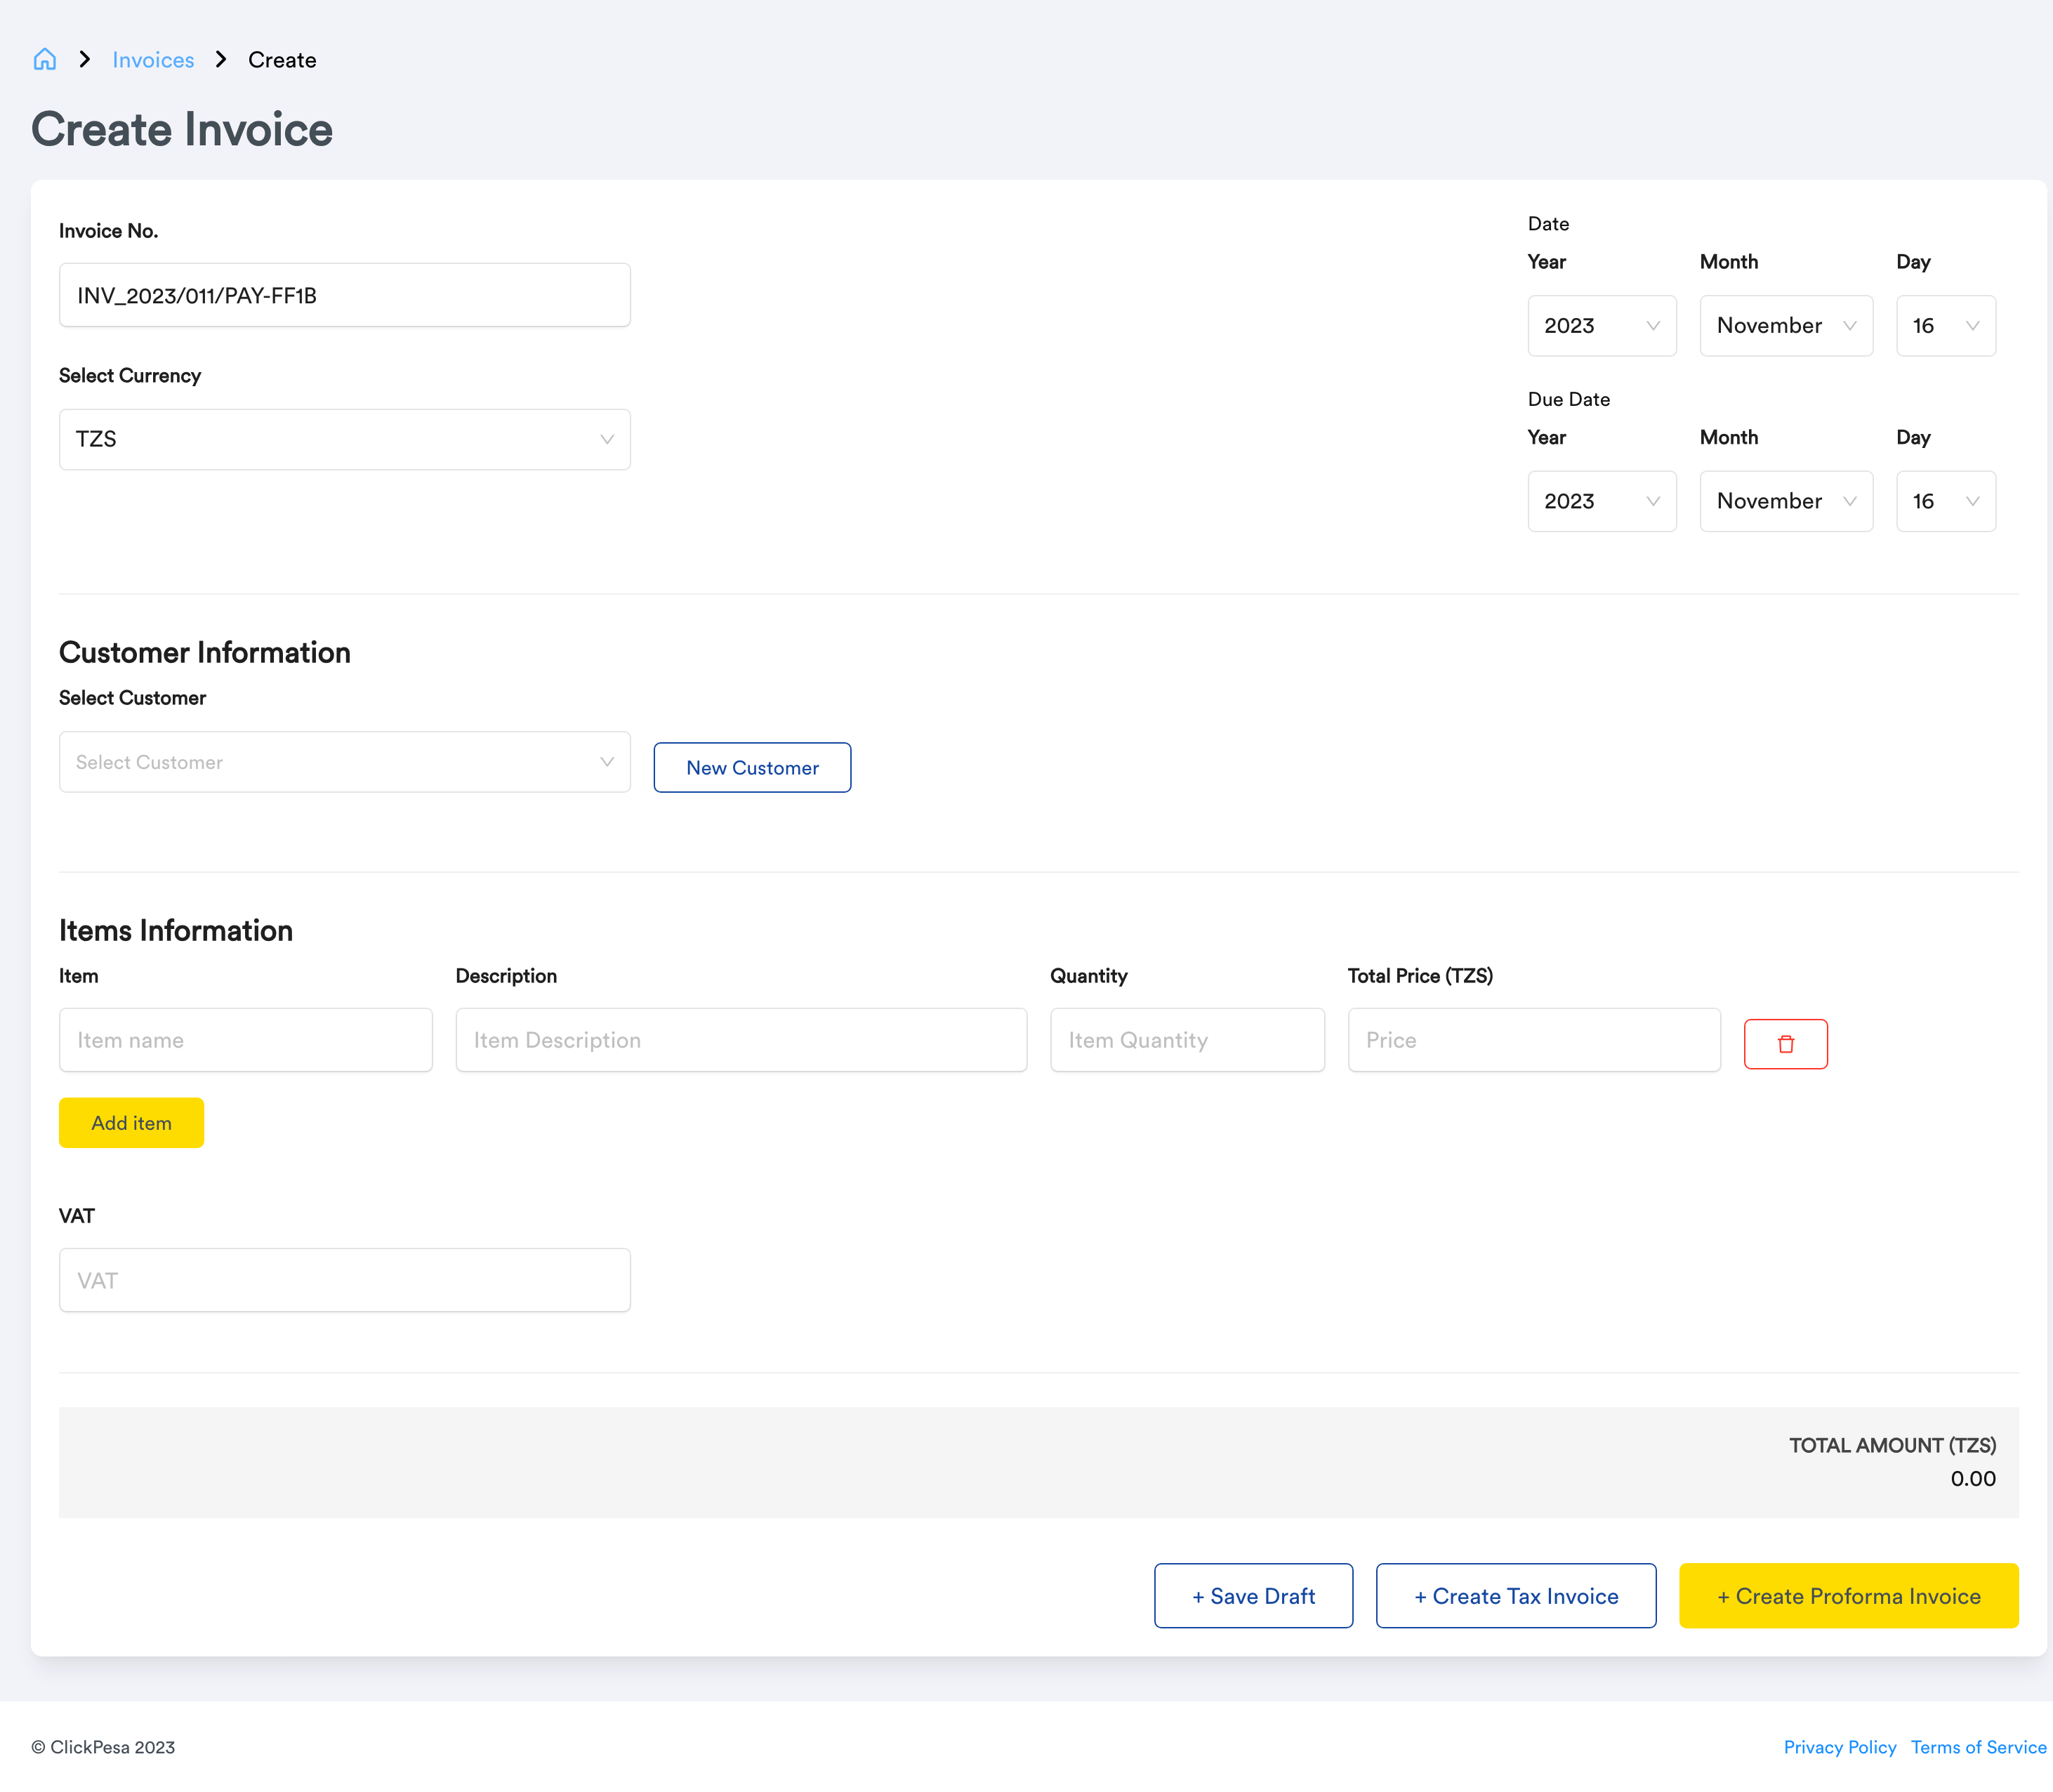 1. Invoice No.
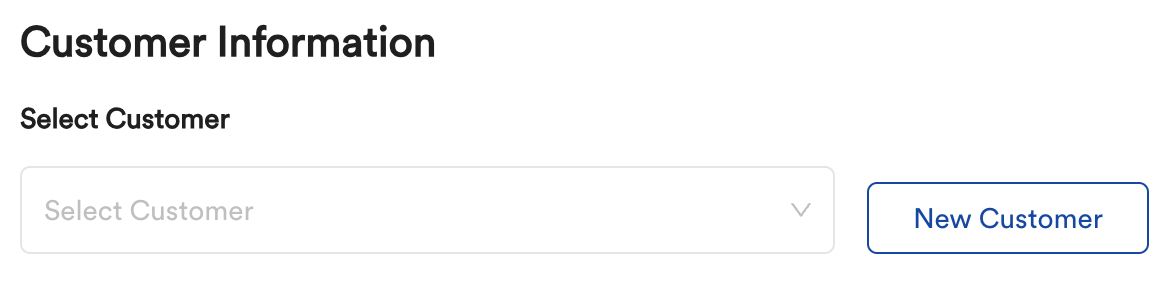
2. Customer. If the customer is not existing, a new customer can be used to create customer following [this guide](/dashboard/customers).
1. Invoice No.
2. Customer. If the customer is not existing, a new customer can be used to create customer following [this guide](/dashboard/customers).
 3. Date
4. Due Date
5. Items
* Item Name
* Description
* Quantity
* Amount
3. Date
4. Due Date
5. Items
* Item Name
* Description
* Quantity
* Amount
 6. VAT
To add more items, use the add item button to add more fields
After all the information is filled in you can:
1. **Save as draft** (notification won’t be sent to customer)
2. **Create Pro Forma Invoice** (an email notification is automatically send to a customer)
* A **Pro Forma Invoice** does not confirm a sale and payment. It acts like a proposal.
3. **Create Tax Invoice** (creates and mark invoice as paid)
* **Tax Invoice** this confirms a sale and payment.
When creating a pro forma invoice, the following email is send to a customer
### How to share an invoice
1. Once an invoice is saved it will redirect to the created invoice page, where it will show summary and items of the created invoice.
2. Invoice exists in three statuses, **DRAFT**, **PENDIN**G, **PARTIAL PAID** and **PAID**
* **DRAFT** means the invoice was created but was neither sent to customer nor paid.
* **PENDING** means a pro forma invoice is sent to a customer but not yet paid.
* **PAID** means the invoice was paid.
* **PARTIAL PAID** means the invoice total payments amount is less than the invoice amount.
3. You have the option resend the e-invoice to the customer via email with a link to the e-invoice.
4. Reminders can be send to a customer if they fail to pay in time
5. All payments made on the e-invoice are visible to the organization.
### How to modify an invoice
1. Invoice can be edited, deleted or marked as paid, When viewing single **DRAFT** or **PENDING** invoice there are three actions, edit, delete and mark as paid
1. E-invoice details can be updated with the latest invoice details
2. E-invoice can be deleted if it is no longer required
3. E-invoice can be marked as paid if customer has paid an invoice without using [Hosted Checkout](/checkout/checkout-page). For example a customer makes a payment using cash.
2. Editing a **PENDING** invoice will send a notification to customer notifying them of the new updates.
3. **PAID** invoice has only one action, delete.
### How to keep track of payments on e-invoice
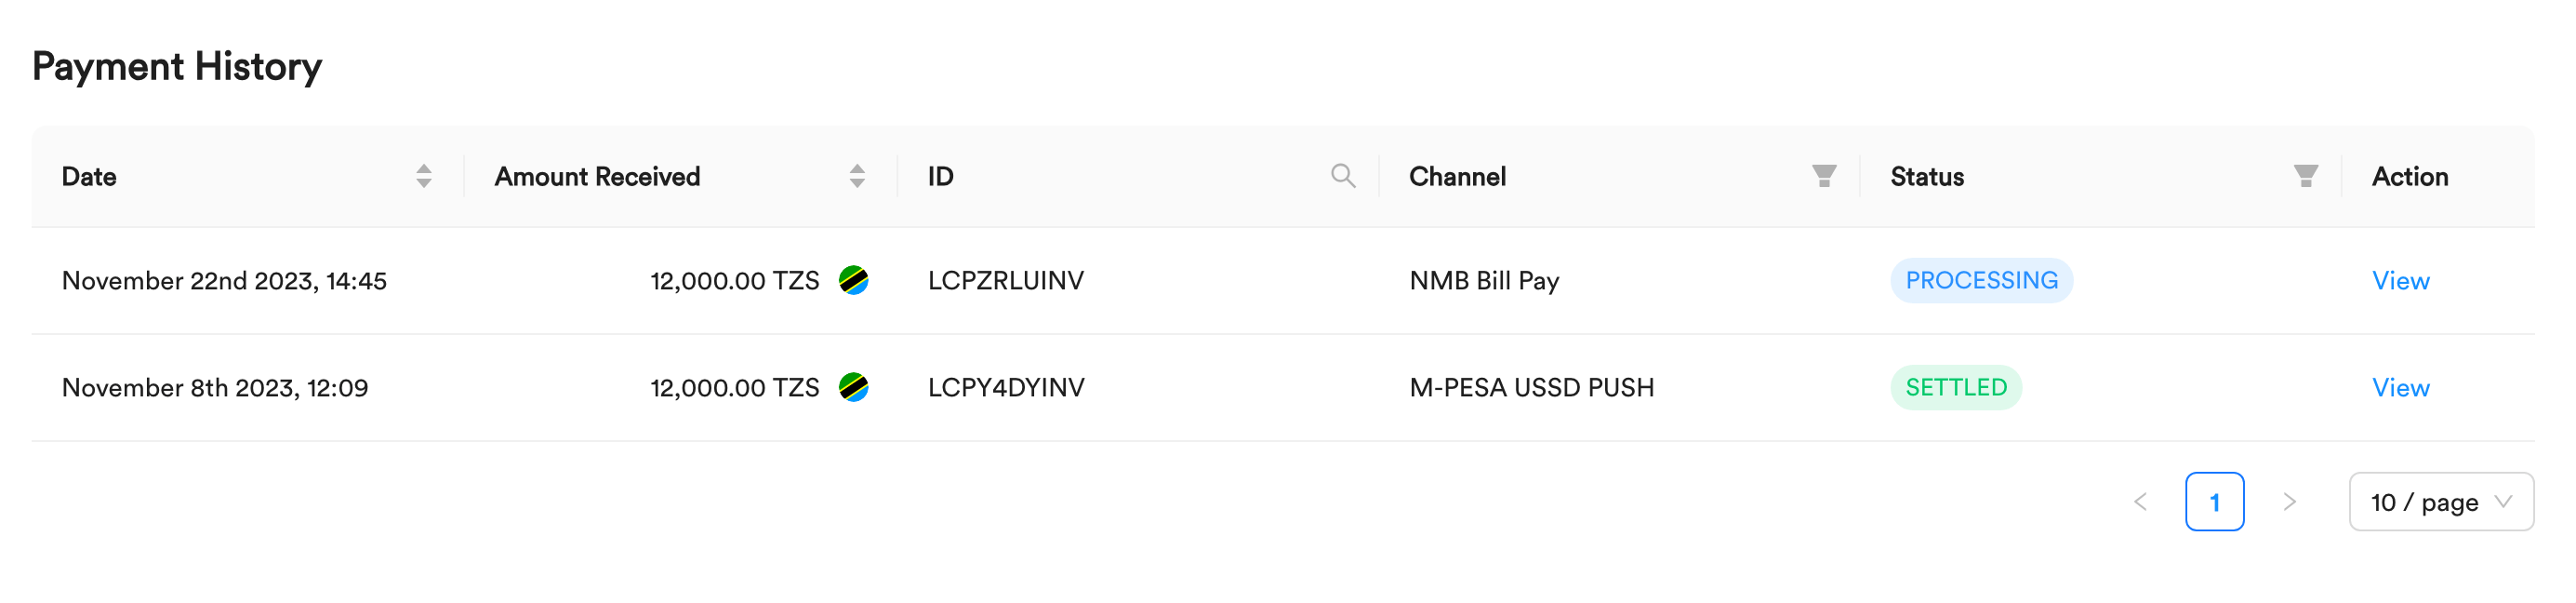
1. On viewing **PAID** invoice it will also show payment history for the invoice.
6. VAT
To add more items, use the add item button to add more fields
After all the information is filled in you can:
1. **Save as draft** (notification won’t be sent to customer)
2. **Create Pro Forma Invoice** (an email notification is automatically send to a customer)
* A **Pro Forma Invoice** does not confirm a sale and payment. It acts like a proposal.
3. **Create Tax Invoice** (creates and mark invoice as paid)
* **Tax Invoice** this confirms a sale and payment.
When creating a pro forma invoice, the following email is send to a customer
### How to share an invoice
1. Once an invoice is saved it will redirect to the created invoice page, where it will show summary and items of the created invoice.
2. Invoice exists in three statuses, **DRAFT**, **PENDIN**G, **PARTIAL PAID** and **PAID**
* **DRAFT** means the invoice was created but was neither sent to customer nor paid.
* **PENDING** means a pro forma invoice is sent to a customer but not yet paid.
* **PAID** means the invoice was paid.
* **PARTIAL PAID** means the invoice total payments amount is less than the invoice amount.
3. You have the option resend the e-invoice to the customer via email with a link to the e-invoice.
4. Reminders can be send to a customer if they fail to pay in time
5. All payments made on the e-invoice are visible to the organization.
### How to modify an invoice
1. Invoice can be edited, deleted or marked as paid, When viewing single **DRAFT** or **PENDING** invoice there are three actions, edit, delete and mark as paid
1. E-invoice details can be updated with the latest invoice details
2. E-invoice can be deleted if it is no longer required
3. E-invoice can be marked as paid if customer has paid an invoice without using [Hosted Checkout](/checkout/checkout-page). For example a customer makes a payment using cash.
2. Editing a **PENDING** invoice will send a notification to customer notifying them of the new updates.
3. **PAID** invoice has only one action, delete.
### How to keep track of payments on e-invoice
1. On viewing **PAID** invoice it will also show payment history for the invoice.
 ## Common Use Cases
1. **Businesses:** Business owners can use the Invoices feature to bill their clients for products or services rendered, helping to maintain cash flow and financial organization.
2. **Freelancers:** Freelancers can create professional invoices for their clients, simplifying the process of requesting payment for their work.
## Frequently Asked Questions (FAQ)
1. **Is an e-invoice the same as a normal invoice?**\
Yes, it is the exact same.
2. **Can I add my business bank account details to the invoice?**\
There is no option to add your business bank account details. The invoice is connected to use bank transfer in the checkout. Once the funds are received by us we will settle those funds in the provided business bank account.
3. **During collection who gets charged, is it me or my customer?**\
The customer is paying the charges when doing a payment depending on the payment method.
4. **My customers don’t have smartphones, how do they pay?**\
The invoice can only be opened on a computer or smartphone as the invoice is web-based. For customers that don't have a computer or smartphone, a merchant can go to the invoice, choose NMB Bill Number (valid for 15 minutes) or Bank Deposit (valid for 7 days) and share these payment instructions and details manually with the customer. The customer can then do the payment accordingly.
5. **When a customer pays me do I get notifications?**\
Currently notifications are not sent when a customer pays.
6. **Is ClickPesa limited to specific operators i.e. M-Pesa, Tigo Pesa, or just Artel Money?**\
There are multiple methods to collect funds via ClickPesa such as Tigo Pesa, Airtel Money, Mpesa, Bank and Card. Learn more about all the [payment methods](/dashboard/settings/collection) that ClickPesa supports.
## Common Use Cases
1. **Businesses:** Business owners can use the Invoices feature to bill their clients for products or services rendered, helping to maintain cash flow and financial organization.
2. **Freelancers:** Freelancers can create professional invoices for their clients, simplifying the process of requesting payment for their work.
## Frequently Asked Questions (FAQ)
1. **Is an e-invoice the same as a normal invoice?**\
Yes, it is the exact same.
2. **Can I add my business bank account details to the invoice?**\
There is no option to add your business bank account details. The invoice is connected to use bank transfer in the checkout. Once the funds are received by us we will settle those funds in the provided business bank account.
3. **During collection who gets charged, is it me or my customer?**\
The customer is paying the charges when doing a payment depending on the payment method.
4. **My customers don’t have smartphones, how do they pay?**\
The invoice can only be opened on a computer or smartphone as the invoice is web-based. For customers that don't have a computer or smartphone, a merchant can go to the invoice, choose NMB Bill Number (valid for 15 minutes) or Bank Deposit (valid for 7 days) and share these payment instructions and details manually with the customer. The customer can then do the payment accordingly.
5. **When a customer pays me do I get notifications?**\
Currently notifications are not sent when a customer pays.
6. **Is ClickPesa limited to specific operators i.e. M-Pesa, Tigo Pesa, or just Artel Money?**\
There are multiple methods to collect funds via ClickPesa such as Tigo Pesa, Airtel Money, Mpesa, Bank and Card. Learn more about all the [payment methods](/dashboard/settings/collection) that ClickPesa supports.